I recently automated my home sprinkler system and I’ve been so happy with the results that I wanted to share my experience.
Getting the Parts
I’ve had a pretty nice Hunter sprinkler controller for years but I wanted to automate the system. So after a bit of research I settled on an Open Sprinkler PI system from Rays Hobby. It had great documentation, is well supported and used a Raspberry PI as its controller. I’ve been wanting to play with a PI for a while now and this was the perfect excuse.
The Open Sprinkler PI system comes with a fully assembled board, a case and extras so you can hook it all up. All you need is the Raspberry PI and a few more parts. Here’s what I bought to get started:
From Ray’s Hobby:
From Amazon:
- RASPBERRY PI MODEL B 756-8308 Raspberry Pi B
- Kingston 8 GB microSDHC Class 4 Flash Memory Card
- Edimax 150 Mbps Wireless 11n Nano Size USB Adapter
You will also need a micro USB cable to power the Raspberry PI while you set it up. Note, that’s a micro USB cable, not mini. I pride myself on having every imaginable cable. But I only had one of these and I had a devil of a time finding it. Order one from Amazon if you don’t have one.
You also need a 24VAC transformer. If you already have a sprinkler controller you probably have one of these. Unfortunately for me, my old Hunter unit had the transformer built in. So I went down to Home Depot and found a wall wart in the irrigation department that fit the bill. Amazon carries them as well.
Initial Setup
Setting the system up could not be easier. Much of the information is in the excellent user manual. Assembly is simply plugging the two boards together. But before you do that, set up your Raspberry PI. And before you do that, load the file system image on the memory card. Download it from here and use these instructions to copy it. I have a Mac and I used the command line technique without any trouble.
This setup assumes you have a home network with a wireless router with DHCP enabled, and that you can access that router with some sort of admin tool (I have an Airport Extreme, so I use Airport Utility).
Once you have the disk image, it’s time to get the Raspberry PI onto your home network. This is the slightly tricky bit, especially if you are like me and want to do it “headless” – without connecting a monitor and keyboard to the PI. Use the low profile memory card adaptor that came with the Open Sprinkler PI and plug the memory card into the PI. Next plug in the Wireless USB Adaptor. You also need to connect to your home network with an ethernet cable. You need to use a wired connection so you can access the PI and setup your wireless network. Now connect the micro USB to power up the PI. You should see blinking lights for a while, but the wireless adaptor may or may not light up.
Login by opening a command line shell on a computer connected to your home network. I use Terminal on the Mac, but you may have to use a 3rd party program if you’re on a Windows PC. The Raspberry PI connects using DHCP, so it should already be on your network.
But first you need to figure out the IP address your PI is connected to. You can guess this if you don’t have many devices connected and you know where your DHCP addresses start. But the easier way is to open whatever admin tool you have for your wireless router. It should show you all the DHCP clients connected and what IP address they are connecting to. Find the one named “OSPI” and write down its IP address (the 4 numbers separated by periods). Now in your terminal type:
ssh pi@<ip address>
This will respond with a request for a password, which is “raspberry”. Once you’re in you’ll want to setup your wireless network name and password. The best resource for this is on the Adafruit site. All I had to do was open the network file:
sudo vi /etc/network/interfaces
Adafruit suggests you use nano, I prefer vi, your choice
and then add or modify the following lines:
iface wlan0 inet dhcp
 wpa-ssid "ssid"
 wpa-psk "password"
where ssid is the name of your wireless network and password is the one for that network. Now type:
sudo reboot
and disconnect the ethernet cable from the Raspberry PI. When it comes up again, the blue light on the wireless adaptor should turn on and you should now be able to login to your PI over wireless.
Beware, once you reboot, the Raspberry PI may connect with a different IP address. In that case you need to go to your router’s admin panel and find out what the new address is. You can avoid this by reading this.
That completes the setup of the Raspberry PI. The only thing left is to plug in the Open Sprinkler board, mount the whole thing in the case and take it to the location where you’ll be hooking it up.
Hooking It All Up
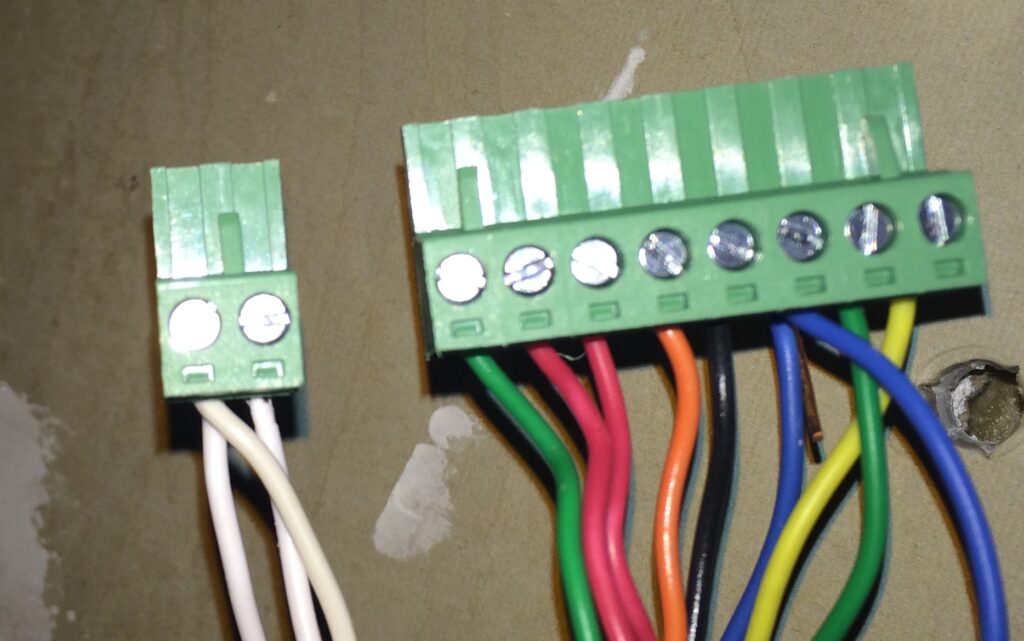
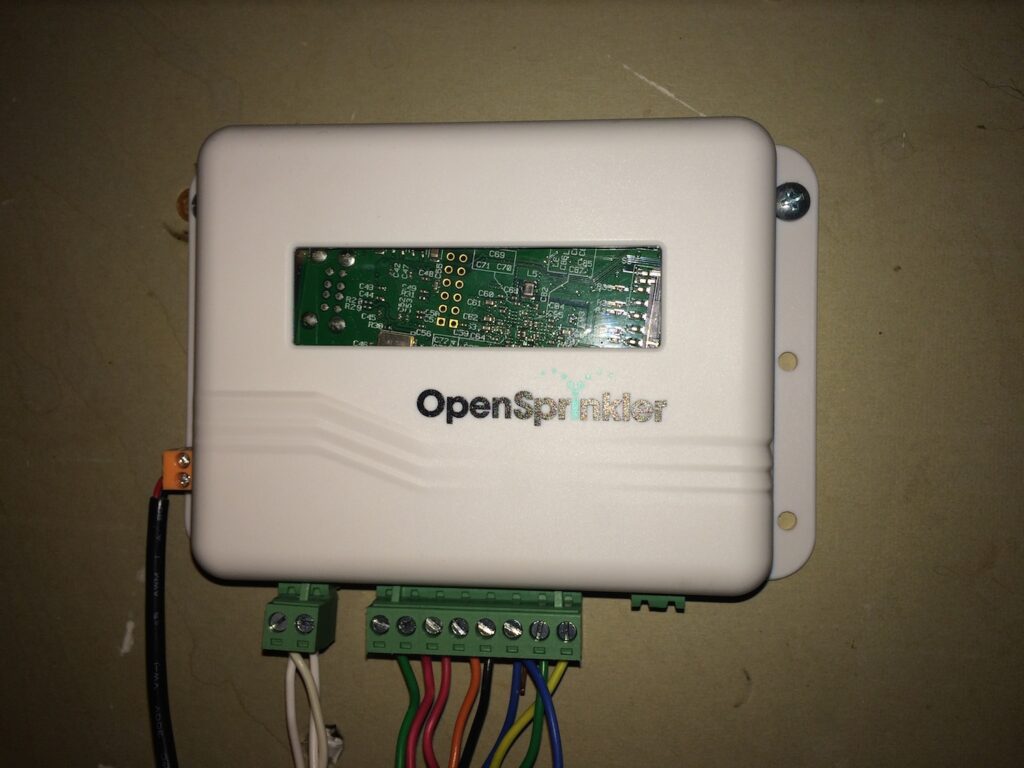
If you have an existing sprinkler controller like I did, you just need to disconnect the wires from the old and connect to the green screw terminal connectors that came with the Open Sprinkler. Remember which channel goes to which to make setup later easier. The small connector is for the grounds and the big one is for each channel.

You need a 24 VAC transformer as well. Typically this is what is running your current sprinkler controller. So you just disconnect it from that and connect it to the 2 pin orange screw terminal. This is AC, so it doesn’t matter which wire go to which terminal. Just make sure not to cause any short circuits.
Now plug in the green and orange connectors and you should see the lights inside case light up. Now you should be able to login just like you did when you were setting up the Raspberry PI.

Web and Mobile Access
The Open Sprinkler software comes configured with a web server. Once up and running you can open your web browser and go to:
http://<your ip address>:8080
And you should see the web interface for the OSPI. There is also a mobile app for iPhone (and Android, although i didn’t test it). The documentation tells you everything you need to know about how to set these up.
My one complaint about the software is the way you need to setup programs. Every sprinkler controller I’ve ever seen lets you set the start time and duration. You can often set multiple start times if you need to water multiple times a day for example. But it’s always been time/duration. In both the web interface and mobile app you have to set start time, end time, a repeat time and duration. This allows you to have the program repeat multiple times a day. That’s a nice feature, but you have to be careful about setting the program up to just have a single start time and duration. So make sure you set the end to longer than the duration x the number of channels you have. And set the repeat time to a large value so it doesn’t repeat. But one of the great things about OSPI is that it has a very active forum. I posted this issue and got a quick response that Ray was working on an update to make it simpler.
All in all, I could not be happier with the system! Thanks Ray’s Hobby.

Leave a Reply