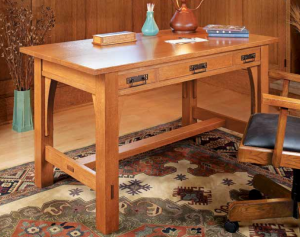
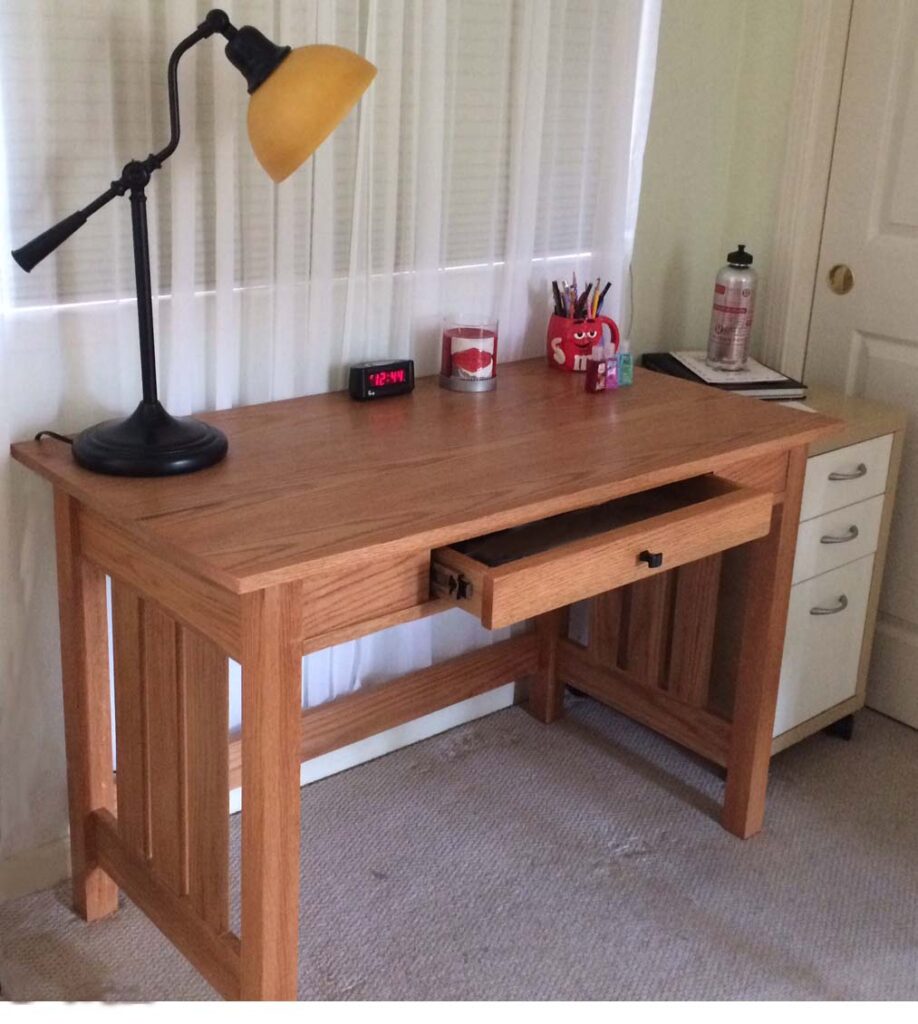
My kids are in high school now so I thought it was time they had nicer desks than the ones we got them at Ikea. I wanted to make something that would last, that they could take with them to college and beyond. I also decided I didn’t want a desk with drawers on the side, just one small drawer at the top for pencils and papers. This was both because they already have roll around cabinets for bigger things and because I didn’t want to complicate this project with a lot of drawers, which are harder to build.
What I really wanted was not a desk at all, but a Library Table. I’ve always like Craftsman style furniture, so I went looking for plans. The internet is a great place for finding just about anything and I quickly came upon two sets of free plans as a starting point:
I liked features of both of these desks. But both were pretty complicated, using mortise and tenon joints and wooden drawer slides. I can use a table saw and other power tools, but I’m no master craftsman, so I set out to simplify the plans and come up with something I could do a good job building.
Joinery
The first thing I needed was a joinery system. I was really worried about this because all the joinery I saw being used in the plans I looked at seemed beyond my abilities. So I did some research and decided on using dowels for the main leg supports, rabbet joints for the drawers and biscuits for everything else.
Wood
When it comes to wood there are lots of choices. You want to select an attractive hardwood for durability. But that doesn’t narrow it down much. Here in the San Francisco Bay Area there are many different woods available. If you go down to Southern Lumber you’ll see an incredible selection. But you’ll also see eye popping prices. I did a sample pricing using cherry wood. It would have been a beautiful desk for around $1500 or so. Not only is it expensive, but at that price I would have been terrified with every cut.
So I went down to Home Depot and found that they had a good supply of red oak. Oak is great wood, if not very exciting. It’s hard, but not very difficult to work with. By contrast, I have some Ipé from a deck I had installed. It is a hardwood too. But it’s super difficult to cut and produces sawdust that’s a real irritant. Your eyes water, your skin itches and you just can’t wait for the whole ordeal to be over.
The oak at Home Depot was reasonably priced. I was able to get everything I needed for around $300. And it had nice straight boards with good grain at a variety of lengths and widths, all 3/4″ thick. They also have maple and cherry (and a little walnut). But they’re more expensive with much less variety and quality of boards. So red oak it was.
My one complaint about the Home Depot boards is that they put one or two stickers on each one. They are paper not plastic, so they rip easily and you really have to work at it to get them off. At first I thought I could just sand them off. But that’s much harder than it seems. So I recommend you get into a Zen place and peel off the stickers when you first buy the boards. The glue left behind is easy to sand off and you’ll be able to pick either side of all boards.
In the plans below I show all the wood and sizes needed. You’ll have to cut these out of various lengths of boards to get what you need. I’ll leave it up to you how you do that. Home Depot has lots of 7′ boards in 3 1/2″ and 5 1/2″ widths. But they have lots of other lengths and widths. If you have a way to transport it, you might be more efficient with a 10 or 12 foot piece of lumber. Just think about what combination of pieces you can get out of each board to minimize waste (both of wood and money).
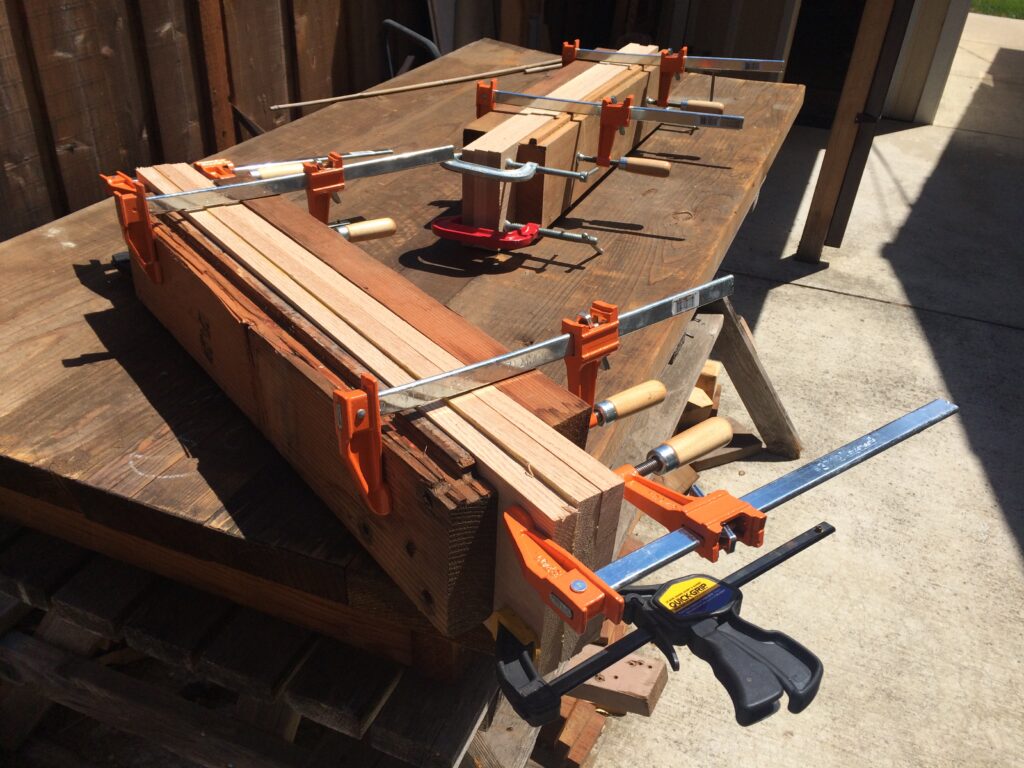
Clamps
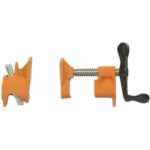
In the process of doing a few woodworking projects I’ve found that you can never have enough clamps. Seems like every time I start a new project I buy 2 or 3 new clamps. My favorites for long edge clamping are pipe clamps. They are pretty cheap and you buy a piece of metal pipe to make them any length you want. I have 4: 2 using half inch pipe and 2 with 3/4 inch, all 48″ long. They can really apply a lot of pressure and are long enough to clamp the legs to the cross members of the desk.
I also have several C clamps, some bar clamps in 1, 2 and 3 foot lengths, a some smaller (and less useful) spring clamps. Make sure you have enough of each.
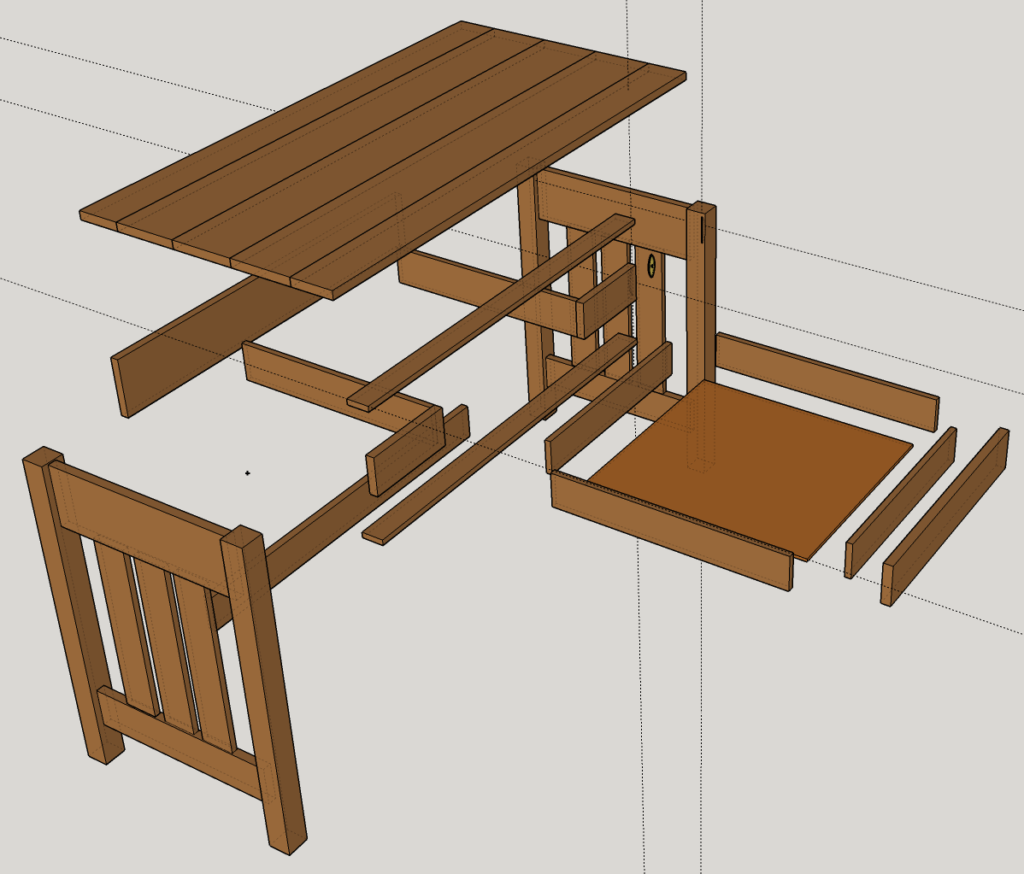
Building the Desk
The Top
To make the top, you need to glue together enough boards to get the 24″ width needed, using biscuits for strength. I used all 5 1/2″ stock, 5 board wide, and cut off the extra 3 1/2″. I recommend starting with the top. You want to select the nicest boards, laying them side by side to see which have the most consistent color and grain and flipping them to see which side is nicer. I found that if you do this and use a light colored varnish you can’t really see any seams at all.
The Legs
The legs are 2″ x 2″ and 29″ long. Since all the wood from Home Depot is 3/4″ thick, I glued 3 boards together to get that thickness. Lots of glueing surface, so no need for any joinery Here. I actually glued together 3 – 5 1/2″ x 30″ boards and then cut them lengthwise into 2 – 2″ x 2 1/4″ legs. My plan was to put a veneer on the face of the legs with with the seams. You make the veneer by cutting a 1/8″ wide strip from a 3 1/2″ wide board and glueing a piece of that to each side. But I found I could put the veneer on one of the faces since the other would be facing to the back. That made it easier to cut the legs to exactly 2″ x 2″, without having to worry about the exact thickness of the veneer.
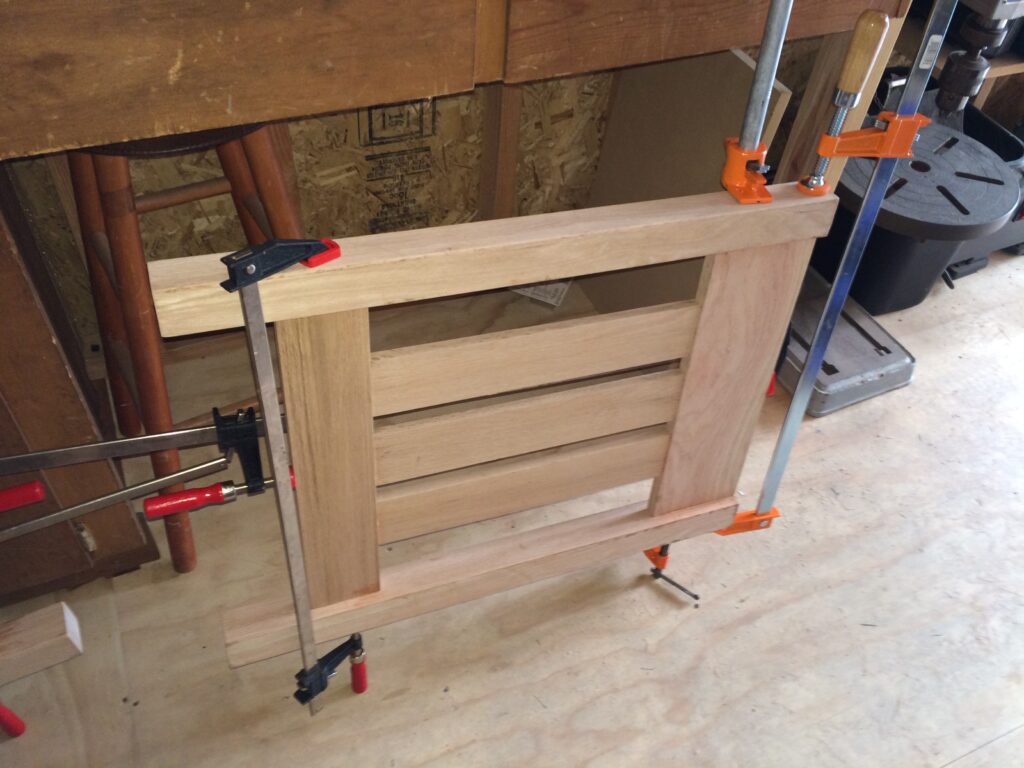
End Pieces
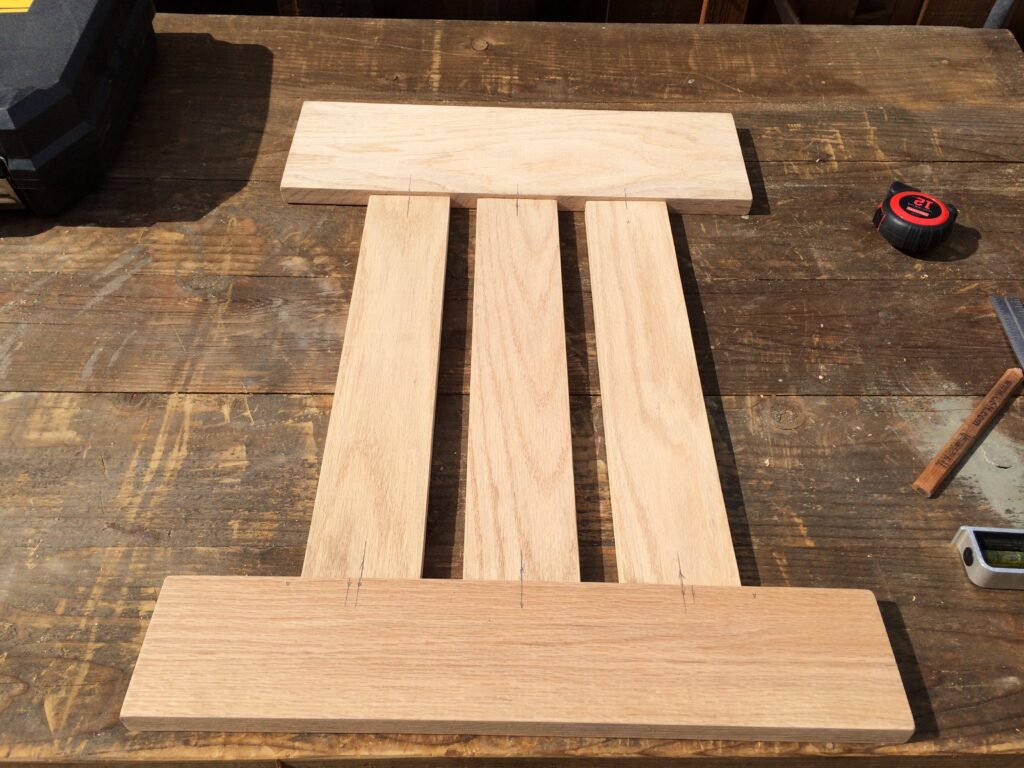
Once the legs are completed it’s time to attach them to the end pieces and the slats. I recommend you sand everything before starting assembly just to make it easier to get into all the corners. The easiest way to proceed is to drill the dowel holes in the top end piece and legs. In fact you’ll want to drill the holes for the cross pieces. That will be 4 holes for the back piece on both sides and two holes for each of the two front pieces on both sides. This will make it a lot easier to do the next step. There’s one last bit of work that needs to be done before assembling the front, so you might as well do it now. Cut the vertical biscuit hole for the right and left front pieces in the front legs. This will be between the two front cross pieces.
Now mark the centers of the attachment points for the slats and cut the biscuit holes for them, as well as for the bottom end piece. Now glue and clamp the slats to the top and bottom pieces and before they are dry, glue and clamp the end pieces to the legs. Assuming all the cuts are straight, everything should be perfectly square. But biscuits have a bit of slop, so make sure the slats like up with the center line marks you made. Set these aside and let them dry, then you’re ready for the next step.
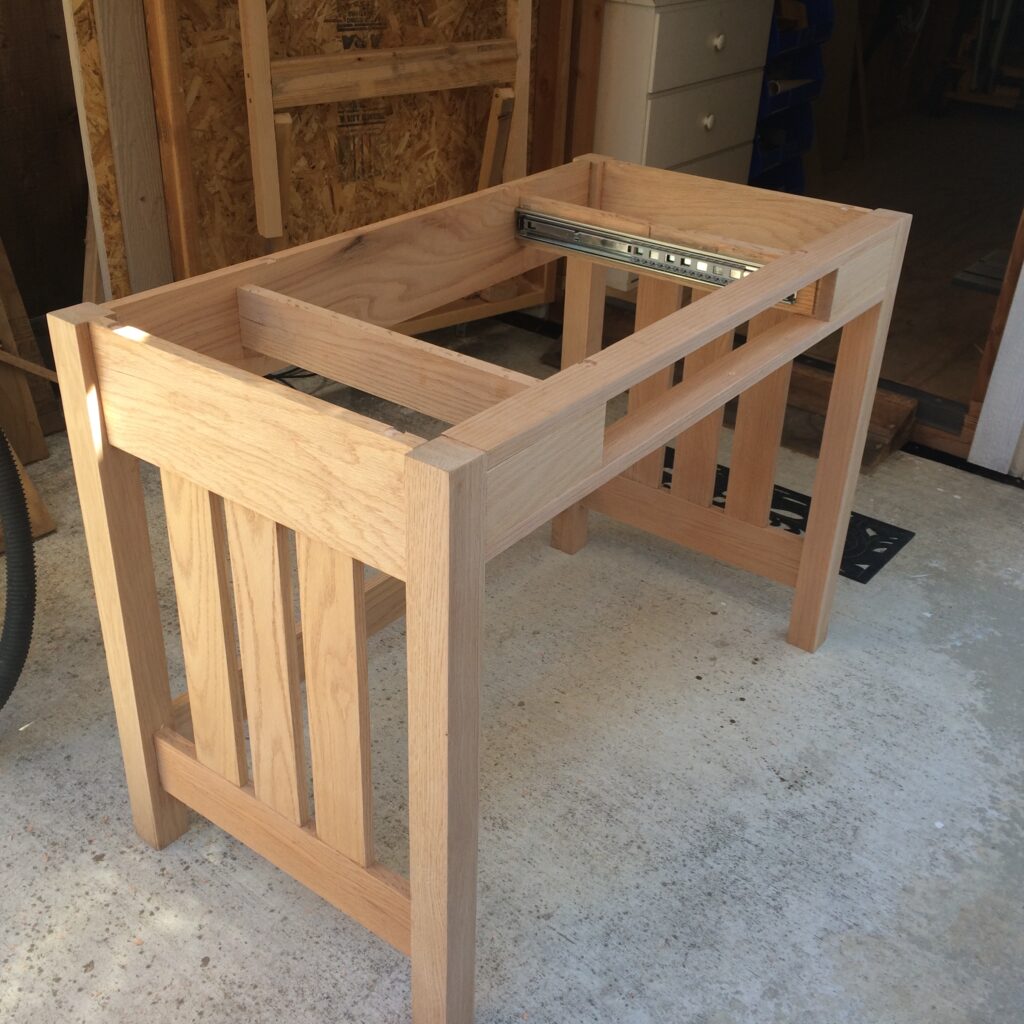
Cross Pieces
Now it’s time to connect the cross pieces, making a structure that will stand on its own. Since you’ve already made the dowel holes, the only cutting here is the biscuit holes for the bottom cross brace in back. Once that’s done you can glue and clamp the two front top cross pieces, the back top cross piece and the back bottom cross piece. Let everything dry and you’re ready for the next step.
Front and Drawer Runners
These pieces fit together and attach to the desk using biscuits. After cutting the biscuit holes, glue the runners to the back then glue in the front right and left pieces. You might want to put a bit of glue on the top and bottom cross pieces, too. But everything should stay pretty solid from here.
The Drawer
The drawer uses locking rabbet joints in the front so it withstands repeated opening, and a standard rabbet in the back. Follow the directions in the link above to cut the slot in the front piece and the locking slots in the front of the side pieces. Then cut a standard 1/2″ x 1/4″ rabbet in the back of the side pieces. Once that’s done, setup the table saw to cut a slot lengthwise 1/4″ from the bottom of all sides and 1/4″ deep. This is for the bottom to slide into. Next glue and nail the sides to the front, then slide in the bottom plywood, then glue and nail the back to the sides. You just made a drawer!
Now is the tricky part. Assuming you got the measurements right, you should have just enough space for the drawer sliders to fit between the drawer sides and the slide supports in the desk. I had to shim a bit, using a couple of washers, to get things to fit just right. Also be careful to make the amount of space above and below the drawer the same. Take your time you should be able to get a nice smooth drawer operation with no rubbing of wood on wood.
Drawer Facade
There is a facade on the front of the drawer to hide the slides. I made a front as a single 3 1/2″ x 36″ piece and then cut it in 3 pieces to get the two side pieces and the facade. That way, the grain matches nicely. But you’ll have to trim the facade so it fits with some clearance. I started by taking 1/16″ off of all 4 sides and continued trimming tiny bits until there was good clearance, but not a big gap.
Next I drilled 2 holes in the front drawer piece (the piece behind the facade). Now I held the facade against the drawer front until there was the same clearance on all 4 sides, marked the positions of the 2 screws, and drilled pilot holes. Don’t drill all the way through the facade. I use blue masking tape on the drill bit 1/2″ down just to make sure. Then screw the facade on with 1″ wood screws and you’re set. Test the fit and do any final adjustments to the slides.
As a last step, drill and install your drawer pull. I used a simple burnished metal knob because it fit the look and only needed one hold to install. But the choice is yours.
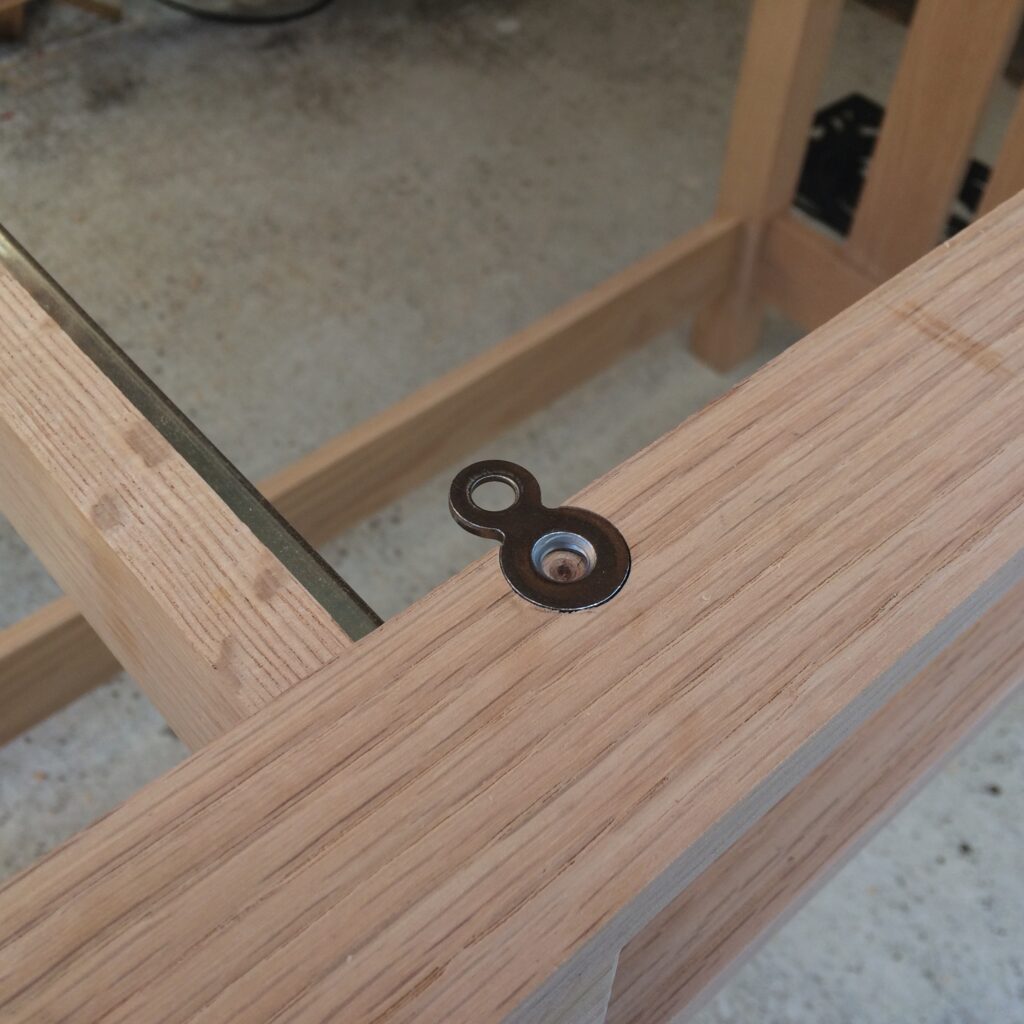
Attach the Top
You attach the top using screw, not glue, to allow for expansion. I used figure 8 fasteners. If you can find them use the ones specifically designer for desks. They fit wood screws nicely without the need for additional washers. To install them select your locations on the desk frame (I chose 6 locations: 2 each on the front and back and 1 on each end). Then use a Forstner bit of the appropriate size and drill deep enough so the fastener sits flush with the top of the frame. Now go around, drill pilot holes and screw the fasteners into the frame.
Forstner bits are not cheap, but they are really useful. They let you drill holes with flat bottoms and are perfect for this sort of counter sinking work. They’re not cheap, but you can buy them individually. So just get one of the right size for this job and build up your collection later. I bought a couple and then asked for more sizes for Christmas 🙂
Next place the top on the frame and adjust it so it’s even on all 4 sides. Then mark the location of the holes in the fasteners, drill pilot holes and screw the top to the frame. Your desk is now built!
Sand and Varnish
Hopefully you’ve been doing some preliminary sanding before putting everything together. If so, you just need to do a light final sanding and then wipe everything down with a damp cloth. Wait a few minutes for it to dry and then put on a coat of polyurethane varnish. A quart is plenty. Let that coat dry, lightly sand the entire desk, and give a pretty good sanding to the top. Then wipe off and apply a second coat. Two coats is good enough, but to get a really smooth top, you can sand and coat only the top once more.
I didn’t actually buy varnish from Amazon. I went down to the hardware store because they have Minwax stain samples. Red oak is a little light and doesn’t have that classic golden oak tone. So I got 4 samples and stained a scrap piece to see which one looked best. I ended up going with Golden Oak (bit surprise!).
Cut List
Legs – 2″ x 2″ x 29″ (3 – 2″ x 3/4″ x 29″, cut to side with 1/8″ veneer on one side)
Top side – 3/4″ x 5 1/2″ x 17 1/2″
Bottom side – 3/4″ x 3 1/2″ x 17 1/2″
Side slats – 1/2″ x 3″ x 16″
Top – 24″ x 46″ x 3/4″ (3 – 5 1/2″ wide, 2 – 3 3/4″ wide)
Top back cross piece – 5 1/2″ x 36″
Bottom back cross piece – 3 1/2″ x 36″
Front cross pieces – 2 – 2″ x 36″
Front facing piece – 3 1/2″ x 36″, cut into 2 – 8″ side pieces and 1 – 20″ facade
Drawer slide supports – 2 – 3″ x 19 3/8″ x 3/4″
Drawer front – 2 3/4″ x 17″ x 1/2″
Drawer back – 2 3/4″ x 17″ x 1/2″
Drawer sides – 2 3/4″ x 19″ x 1/2″
Drawer bottom – 17″ x 18″ x 1/2″ birch (or any hardwood) plywood, one side appearance grade


Leave a Reply